Setting up an indoor FPV (First Person View) drone for the first time can be an exciting yet daunting task. As an indoor FPV drone supplier, I've helped numerous customers through this process. In this blog, I'll guide you step - by - step on how to set up your indoor FPV drone.
Step 1: Unboxing and Inspection
When you receive your indoor FPV drone, the first step is to carefully unbox it. Check all the components included in the package. This typically includes the drone itself, a remote controller, batteries, propellers, and possibly a set of goggles. Inspect each item for any visible damage. If you find any issues, contact your supplier immediately.
Step 2: Understanding the Drone Components
Before you start assembling or setting up, it's crucial to understand the different parts of the drone. The frame is the structure that holds all the components together. The motors are responsible for generating the lift that allows the drone to fly. The flight controller is the brain of the drone, which processes the input from the remote controller and controls the motors accordingly. The battery provides power to the drone, and the propellers create the thrust.
Step 3: Battery Charging
The battery is a vital part of your FPV drone. Make sure to use the charger that comes with your drone to charge the battery. It's important to follow the charging instructions carefully. Overcharging or undercharging the battery can reduce its lifespan and performance. Generally, it takes about 30 minutes to an hour to fully charge a small indoor FPV drone battery.
Step 4: Propeller Installation
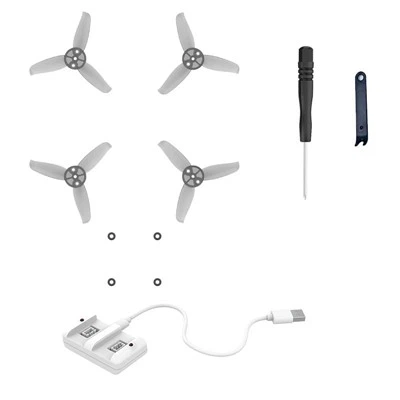
Installing the propellers correctly is essential for safe and efficient flight. Most indoor FPV drones come with two types of propellers: clockwise (CW) and counter - clockwise (CCW). Make sure to install them in the correct orientation as indicated on the drone's motor arms. Usually, the markings on the propellers and the motor arms will help you with this. Tighten the propellers securely, but be careful not to over - tighten them as this can damage the motor.
Step 5: Connecting the Remote Controller
The next step is to connect the remote controller to the drone. First, turn on the remote controller and put it in pairing mode. Then, power on the drone. The drone should automatically search for the remote controller's signal. Once they are paired, you'll see the indicator lights on both the drone and the remote controller change. This indicates that they are successfully connected.
Step 6: Calibrating the Drone
Calibration is an important step to ensure that the drone flies smoothly. Most drones have a built - in calibration feature. Place the drone on a flat and level surface. Follow the instructions in the user manual to enter the calibration mode. During calibration, the drone will adjust its sensors to account for any imbalances. This process may take a few minutes.
Step 7: FPV Goggles Setup (if applicable)
If your indoor FPV drone comes with goggles, you need to set them up as well. First, turn on the goggles and the drone's video transmitter. The goggles should automatically search for the video signal from the drone. Once the signal is detected, you'll see a live feed from the drone's camera on the goggles. Adjust the focus and other settings on the goggles to get a clear view.


Step 8: Pre - flight Checks
Before you take your drone for its first flight, perform a pre - flight check. Check the battery level, the propellers for any loose parts, and the connection between the remote controller and the drone. Make sure the area where you plan to fly the drone is clear of obstacles and people.
Step 9: First Flight
Now it's time for the exciting part - the first flight! Start by taking off slowly and gently. Use the controls on the remote controller to move the drone forward, backward, left, and right. Keep the flight at a low altitude and in a controlled environment. As you gain more confidence, you can gradually increase the altitude and try more complex maneuvers.
Step 10: Troubleshooting
If you encounter any problems during the setup or flight, don't panic. Most issues can be resolved by referring to the user manual. Common problems include the drone not taking off, the video feed being unstable, or the remote controller not working. If you can't solve the problem on your own, contact your supplier for assistance.
As an indoor FPV drone supplier, we offer a wide range of products to meet your needs. For those interested in drone education, we recommend our 5 Inch FPV Drone for Drone Education. This drone is specifically designed for educational purposes, with features that make it easy to learn and operate.
If you're looking for a kit for training, our FPV Drones Kit for Training is a great choice. It comes with everything you need to start your FPV drone training, including the drone, remote controller, and batteries.
For a more immersive experience, our FPV Drone Kit with Goggles is the perfect option. With high - quality goggles, you can enjoy a real - time first - person view of the drone's flight.
If you're interested in purchasing our indoor FPV drones or have any questions about the setup process, feel free to contact us for a procurement discussion. We're here to help you make the most of your FPV drone experience.
References
- Manufacturer's user manuals for indoor FPV drones
- Online FPV drone forums and communities